
Last Updated on November 27, 2023
Are you tired of switching between multiple email accounts? If you use Thunderbird, you can manage all your emails in one place, including your Gmail account. In this article, we will show you how to set up Gmail in Thunderbird, step-by-step. By the end of this article, you will be able to access your Gmail account in Thunderbird and manage it with ease.
Let’s get started!
Set up Gmail Account in Thunderbird
These are the things you need to do to set up Gmail in Thunderbird:
- Enable IMAP in Gmail
- Configure Gmail account in Thunderbird
Step 1: Enable IMAP in Gmail
Before setting up Gmail in Thunderbird, you need to enable IMAP in your Gmail account. Here is how you can do it:
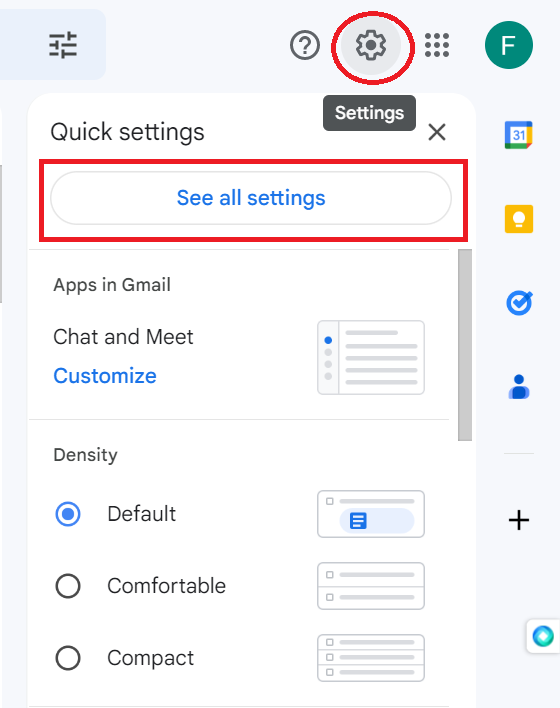
01 Open your Gmail account, click on the gear icon at the top-right corner of the page, and then click on “Settings.”
02 In the “Settings” page, click on the “Forwarding and POP/IMAP” tab.

03 Under the “IMAP access” section, click on the radio button next to “Enable IMAP.”

04 Make sure to click on the “Save Changes” button at the bottom of the page.

Step 2: Configure Gmail Account in Thunderbird
Here are the steps on how to configure your Gmail account in Thunderbird:
01 Launch Thunderbird and click on the “File” menu.

02 Click on “New” and select “Existing mail account” in the dropdown section.

03 Enter your name, Gmail address, and the password of your Gmail account. Then, click on the “Continue” button.

04 Thunderbird will automatically try to detect the configuration of your Gmail account. Once it does, confirm the settings and click on the “Done” button.

However, if Thunderbird is not able to detect the settings, you need to configure it manually. Here is how you can do it:
05 Click on “Configure manually.”

06 Enter the following settings:
Incoming Server
- Protocol: IMAP
- Hostname: imap.gmail.com
- Port: 993
- Connection security: SSL/TLS
- Authentication method: OAuth2
- Username: your Gmail email address
Outgoing Server
- Hostname: smtp.gmail.com
- Port: 465
- Connection security: SSL/TLS
- Authentication method: OAuth2
- Username: your Gmail email address

07 Click on “Done.”

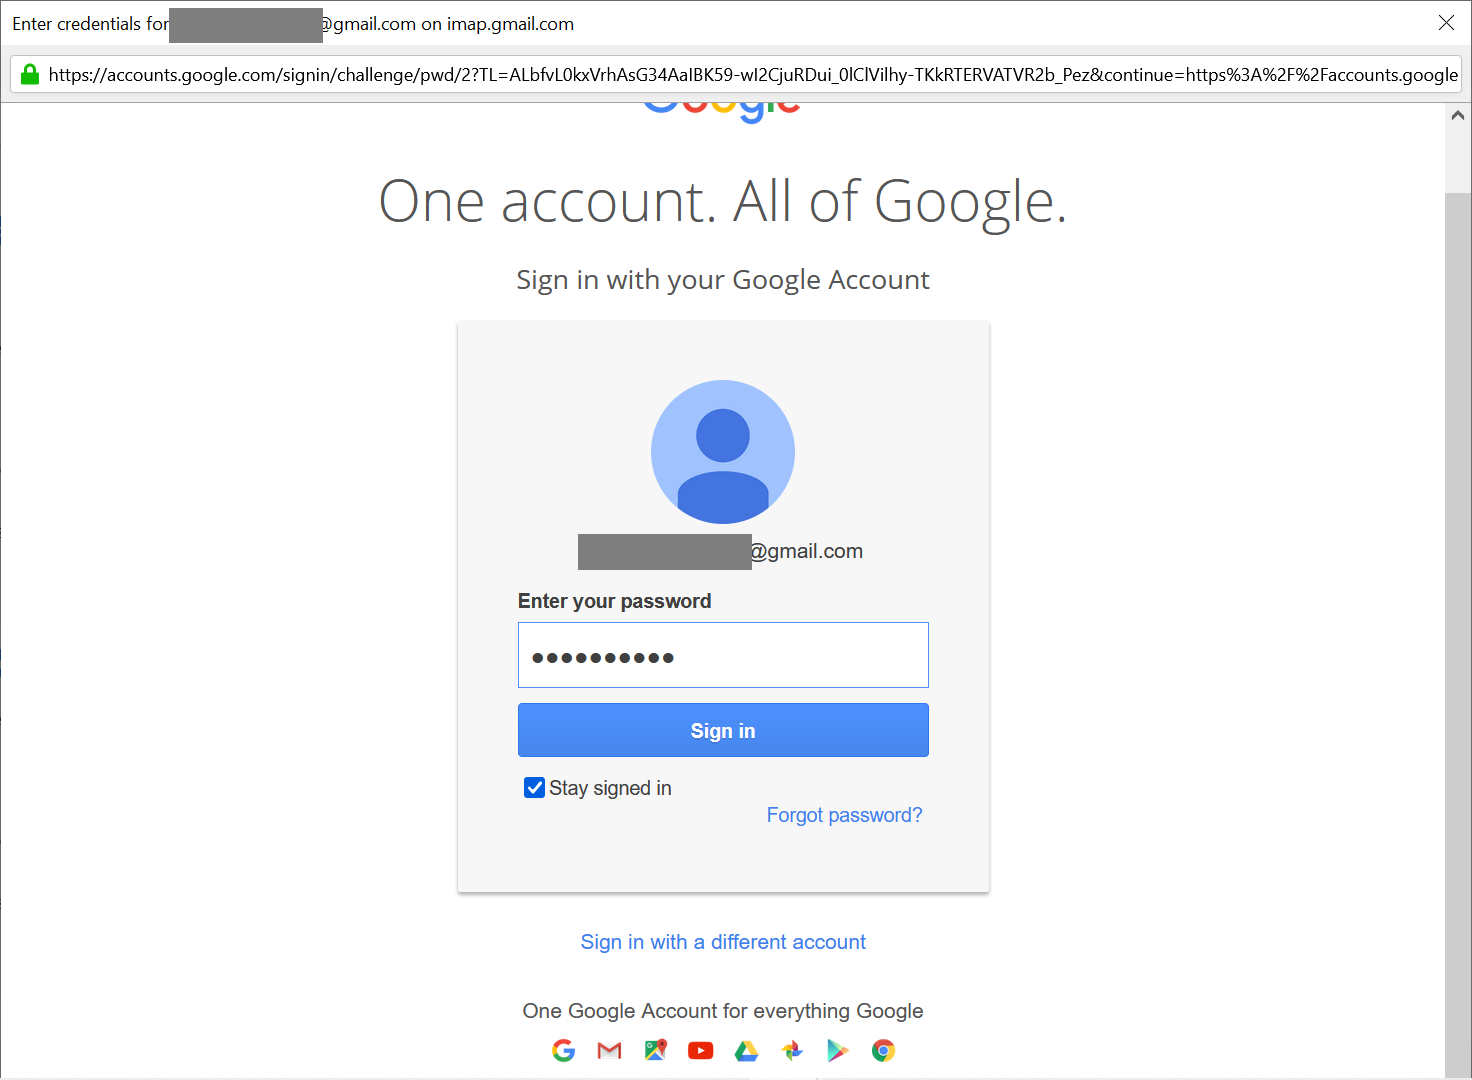
08 After configuring the account, Thunderbird will verify your Gmail account. You may be asked to enter your password again.
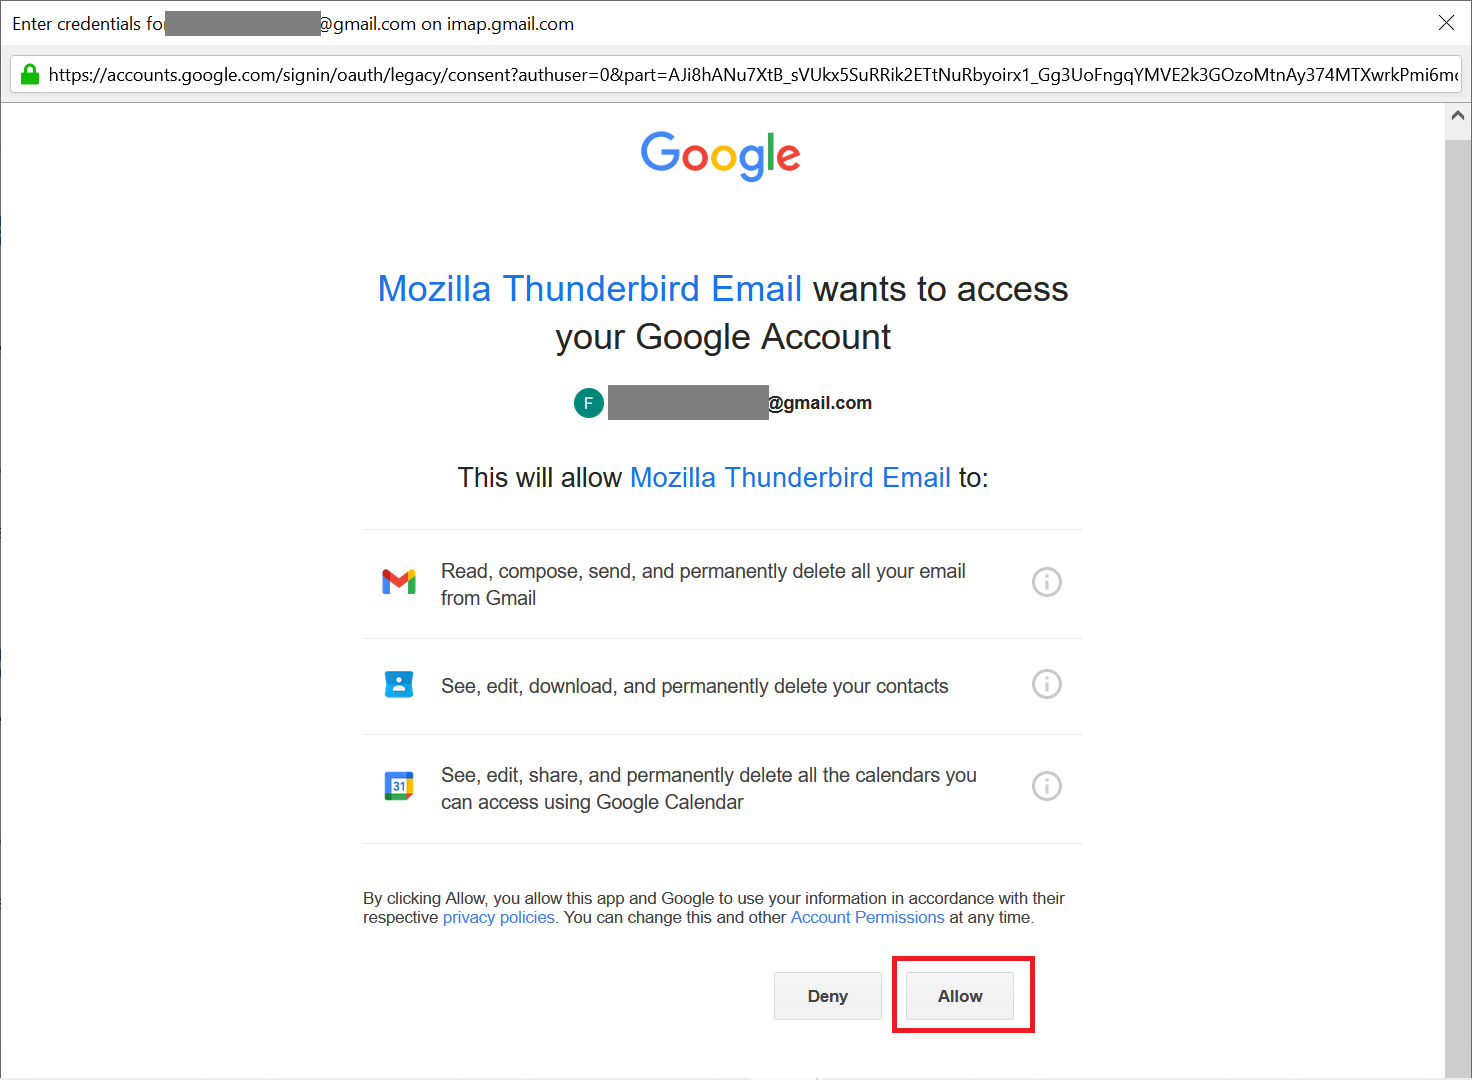
09 Click on Allow access so Thunderbird can connect to the Gmail account and acquire permission to read and manage emails, contacts and calendars.
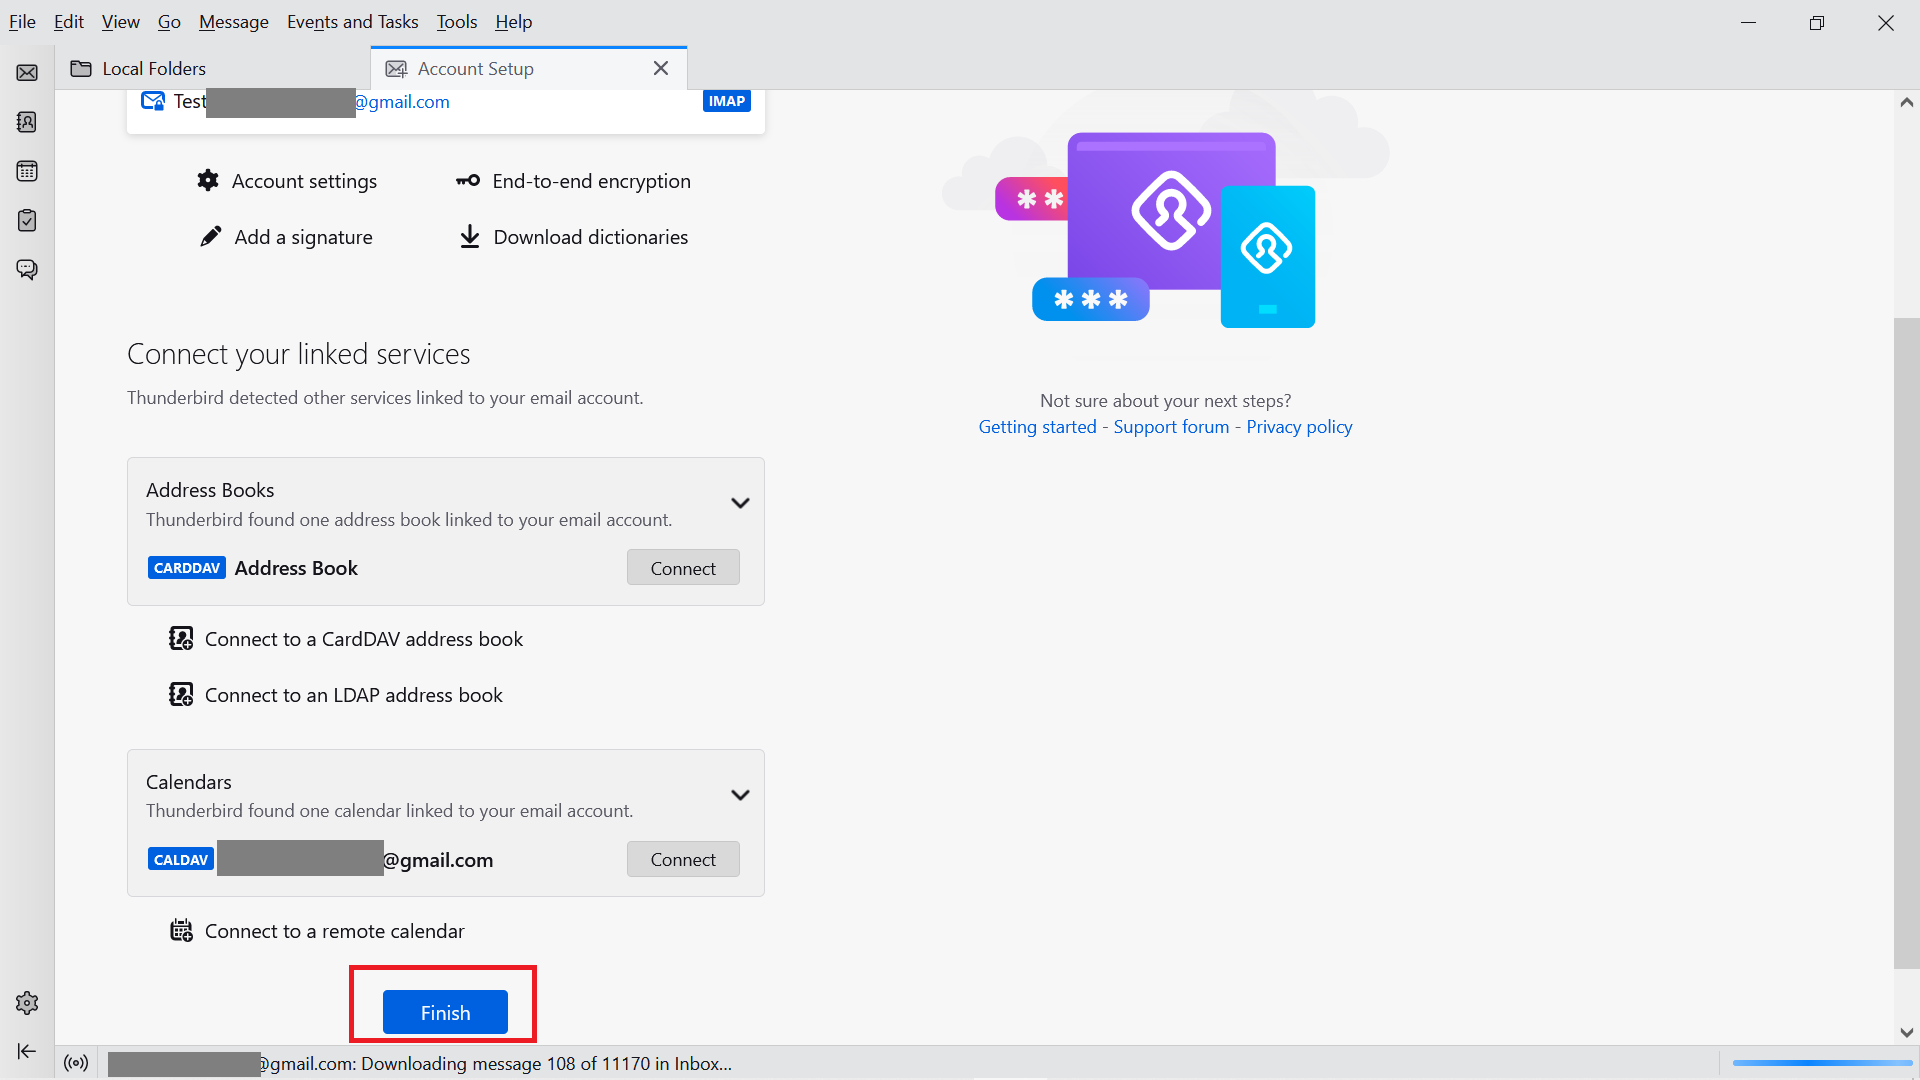
10 At last, click the Finish button to finish setting up Gmail account in Thunderbird.
Once the account is verified, All your Gmail emails will appear in the Thunderbird inbox. You can also delete the account in Thunderbird in the future without any issues.
Thunderbird & Gmail – A Perfect Match for Efficient Email Management
Thunderbird and Gmail are a perfect match for those who want to manage their emails efficiently. With Thunderbird, you can take advantage of its numerous productivity features, including custom filters, tags, and smart folders. Gmail, on the other hand, gives you access to advanced email management tools like the priority inbox and snooze feature. By using both platforms together, you can make email management a breeze.
Setting up Gmail in Thunderbird is a convenient way to access your emails without having to log in to your Gmail account every time. It also allows you to synchronize your emails and contacts across multiple devices.
To set up Gmail in Thunderbird, you would need to follow the steps mentioned above, which involve configuring the incoming and outgoing servers, selecting the right authentication method, and granting Thunderbird access to your Gmail account. Once the process is complete, you can manage your Gmail emails, contacts, and calendars from within Thunderbird.
Conclusion
Setting up account Gmail in Thunderbird is a simple and easy process that can be completed in just a few minutes. You can manage all your email accounts in one place using Thunderbird. So, if you want to access your Gmail account from Thunderbird, follow the steps mentioned above, and enjoy using Thunderbird. By the way, do not forget to keep a separate backup of Thunderbird emails for emergencies.